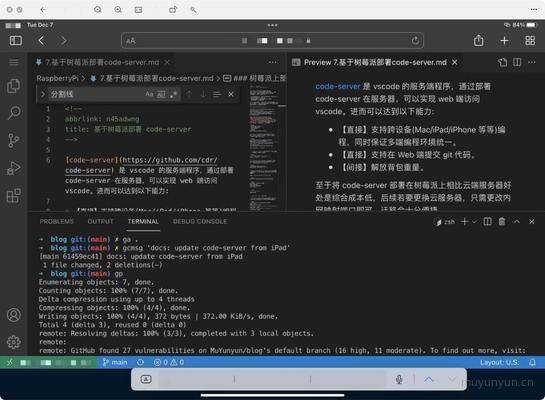
code-server 是 vscode 的服务端程序,通过部署 code-server 在服务器,可以实现 web 端访问 vscode。进而可以达到以下能力:
- 【直接】支持跨设备(Mac/iPad/iPhone 等等)编程,同时保证多端编程环境统一。
- 【直接】支持在 web 端提交 git 代码。
- 【间接】解放背包重量😁。
至于将 code-server 部署在树莓派上相比云端服务器好处是综合成本低,后续若要更换云服务器,只需更改内网映射端口即可,迁移会十分便捷。
树莓派上部署 code-server
参考 code-server 官网,在树莓派上其推荐使用 yarn 的方式来进行安装 code-server。
此外前置安装提到 node.js 版本需要与所下载的 VSCode's Electron 所依赖的版本一致。笔者下载的 code-server 版本为 code-server_3.12.0_arm64.deb,其需要 node.js 14.x 版本。执行如下命令进行前置安装:
sudo apt-get install -y \build-essential \pkg-config \python3npm config set python python3
按照 yarn 官网 所述,在 Debian / Ubuntu 系统中安装 yarn:
curl -sS https://dl.yarnpkg.com/debian/pubkey.gpg | sudo apt-key add -echo "deb https://dl.yarnpkg.com/debian/ stable main" | sudo tee /etc/apt/sources.list.d/yarn.listsudo apt update && sudo apt install yarnyarn --version // 1.22.15
执行 sudo vim .bashrc,将 yarn 全局安装命令的执行路径写入 .bashrc 文件。
export PATH="$PATH:`yarn global bin`"source ~/.bashrc # 使之生效
参照 code-server 官网安装教程,执行以下命令安装 code-server:
yarn global add code-servercode-server --version # 3.12.0
笔者使用 npm install -g code-server 无法成功安装,最终使用 yarn global add code-server 安装成功。
编辑 .config/code-server/config.yaml
sudo vim .config/code-server/config.yaml
bind-addr: 127.0.0.1:5555auth: passwordpassword: xxxxxxxxxcert: false
# 启动 code-servercode-server
在 frpc.ini 中添加以下配置:
frpc.ini 与 pm2 的完整配置说明可以参考内网穿透章节。
[vscode-server-frp-muyunyun-cn-5555]type = tcplocal_ip = 127.0.0.1# code-server 服务运行在树莓派本地的 5555 端口上local_port = 5555# 对外运行在服务器端云主机 5555 端口上remote_port = 5555
使用 pm2 重启 frpc 服务:
cd /opt/frp_0.37.0_linux_arm64pm2 restart start_frpc.sh
此时在 frps 服务器端(云主机)中通过 lsof -i:5555 可以看到服务端端口 5555 已经被 frps 服务占据。

同时在公网中可以看到 code-server 服务已成功运行
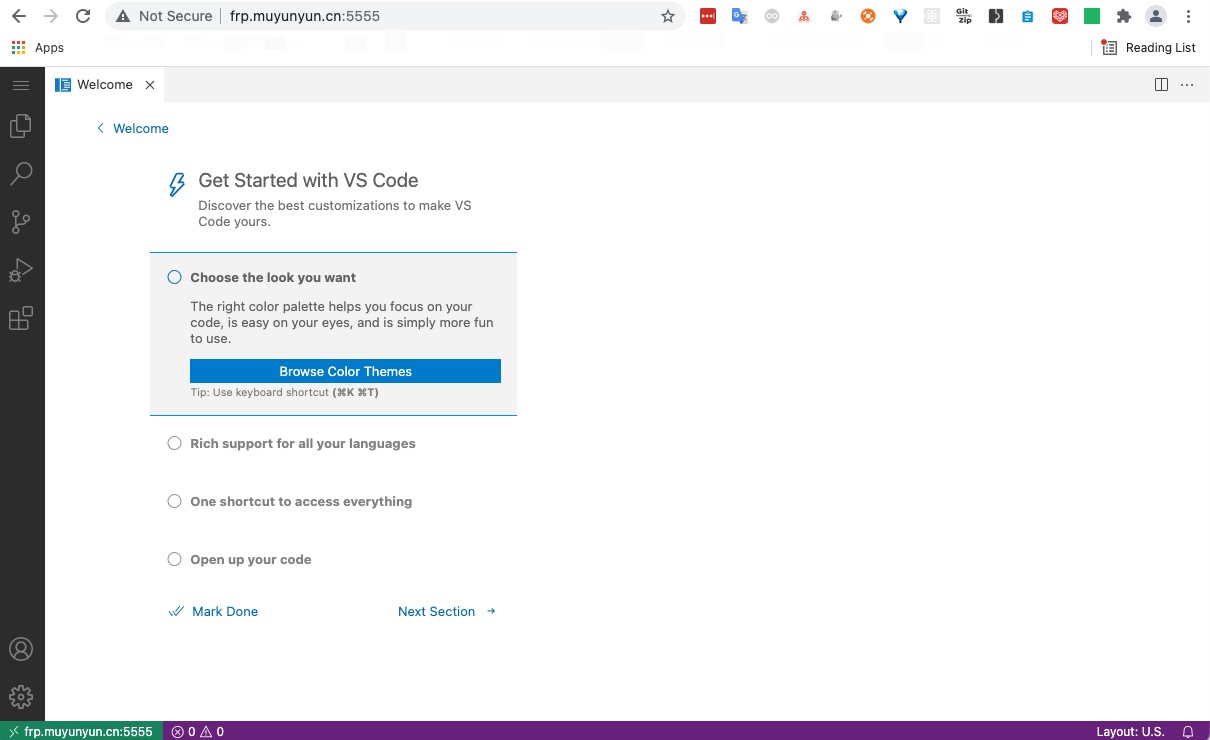
使用 pm2 守护运行 code-server 以让相关服务遇到意外(比如断电后)能自动重启:
cd /opt/frp_0.37.0_linux_arm64sudo touch start_code_server.shsudo chmod 777 start_code_server.shsudo echo "code-server" > start_code_server.shpm2 start /opt/frp_0.37.0_linux_arm64/start_code_server.shpm2 save
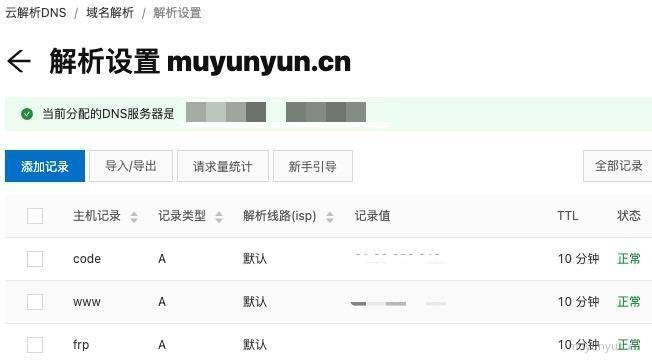
笔者在域名解析处新增 code 主机记录以语义化访问 code-server 服务,此时访问 http://code.muyunyun.cn:5555 与访问 http://frp.muyunyun.cn:5555 效果是相同的。
支持 HTTPS 协议访问
访问 HTTP 下的 code-server 服务,发现不能完整使用插件、剪切板等功能模块。
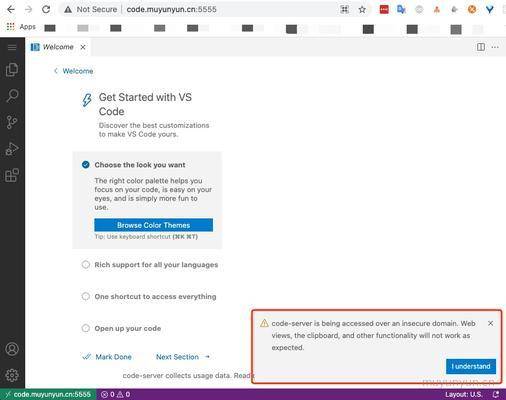
根据控制台报错信息,推测这些模块依赖了 service work,查阅 Setting up to play with service workers 得知, service work 确实必须在 Https 协议中使用。
因此若要完整地使用 code-server 服务,需要配置 HTTPS 协议,配置过程记录在 HTTPS 域名配置 章节中,其介绍了给域名获取免费的 Https 证书并让 Https 生效的过程。
支持在 HTTPS 协议中访问 WebSocket
在配置完 HTTPS 服务后,访问 HTTPS 链接发现还是无法在 web 端正常使用 vscode,排查发现 code-server 使用 WebSocket 以保持长连接,因此需要在 nginx 配置(云服务器端)文件中增加对 WebSocket 配置。
执行 vim /etc/nginx/conf.d/www.muyunyun.cn.conf 进行编辑,完整的 nginx 配置如下:
map $http_upgrade $connection_upgrade {default upgrade;'' close;}upstream code_muyunyun_cn {server 127.0.0.1:5555;}server {server_name code.muyunyun.cn;listen 80;listen [::]:80;rewrite ^(.*)$ https://$host$1 permanent;error_page 404 /404.html;location = /40x.html {}error_page 500 502 503 504 /50x.html;location = /50x.html {}}server {listen 443 ssl http2;listen [::]:443 ssl http2;server_name code.muyunyun.cn;root /usr/share/nginx/html/code.muyunyun.cn;location / {proxy_pass http://code_muyunyun_cn;proxy_set_header Host $host:443;proxy_set_header X-Real-IP $remote_addr;proxy_set_header X-Forwarded-For $proxy_add_x_forwarded_for;# support websocketproxy_http_version 1.1;proxy_set_header Upgrade $http_upgrade;proxy_set_header Connection $connection_upgrade;}ssl_certificate "/etc/nginx/ssl/code.muyunyun.cn/fullchain.cer";ssl_certificate_key "/etc/nginx/ssl/code.muyunyun.cn/code.muyunyun.cn.key";ssl_session_cache shared:SSL:1m;ssl_session_timeout 10m;ssl_ciphers HIGH:!aNULL:!MD5;ssl_prefer_server_ciphers on;# Load configuration files for the default server block.include /etc/nginx/default.d/*.conf;error_page 404 /404.html;location = /40x.html {}error_page 500 502 503 504 /50x.html;location = /50x.html {}}
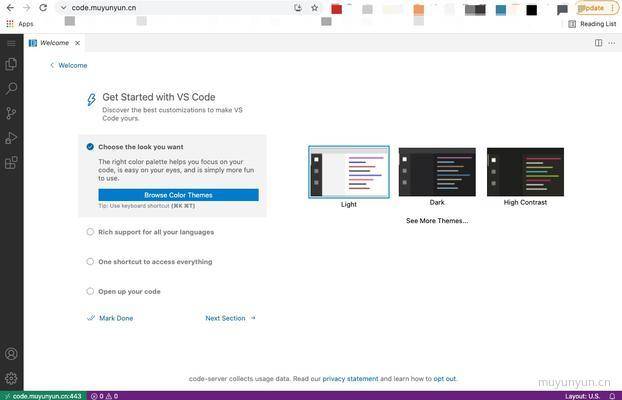
重新加载 nginx 配置后,此时已经可以在 web 端使用上 code-server 的能力。
在 web 端中提交 git 代码
登入树莓派端,执行如下命令生成 ssh 密钥:
# 以 github 为例ssh-keygen -t rsa -C "youremail@example.com" -f ~/.ssh/github
然后将 ~/.ssh/github.pub 公钥中的内容复制到剪贴板,拷贝到 GitHub ssh 的 Key 文本框中。
经验证,至此已经可以在 web 中提交代码到 github。
