0%

从 0 到 1 实现 React 系列 —— 5.PureComponent 实现 && HOC 探幽

本系列文章在实现一个 cpreact 的同时帮助大家理顺 React 框架的核心内容(JSX/虚拟DOM/组件/生命周期/diff算法/setState/PureComponent/HOC/…) 项目地址

PureComponent 精髓

使用 PureComponent 是优化 React 性能的一种常用手段,相较于 Component, PureComponent 会在 render 之前自动执行一次 shouldComponentUpdate() 函数,根据返回的 bool 值判断是否进行 render。其中有个重点是 PureComponent 在 shouldComponentUpdate() 的时候会进行 shallowEqual(浅比较)。

PureComponent 的浅比较策略如下:

对 prevState/nextState 以及 prevProps/nextProps 这两组数据进行浅比较:

1.对象第一层数据未发生改变,render 方法不会触发;
2.对象第一层数据发生改变(包括第一层数据引用的改变),render 方法会触发;

PureComponent 的实现

照着上述思路我们来实现 PureComponent 的逻辑

1
2
3
4
5
6
7
8
9
10
11
12
13
14
15
16
17
18
19
20
21
22
23
24
25
26
27
28
29
30
31
32
33
34
35
36
37
38
39
40
41
42
43
44
45
46
47
48
function PureComponent(props) {
this.props = props || {}
this.state = {}

isShouldComponentUpdate.call(this) // 为每个 PureComponent 绑定 shouldComponentUpdate 方法
}

PureComponent.prototype.setState = function(updater, cb) {
isShouldComponentUpdate.call(this) // 调用 setState 时,让 this 指向子类的实例,目的取到子类的 this.state
asyncRender(updater, this, cb)
}

function isShouldComponentUpdate() {
const cpState = this.state
const cpProps = this.props
this.shouldComponentUpdate = function (nextProps, nextState) {
if (!shallowEqual(cpState, nextState) || !shallowEqual(cpProps, nextProps)) {
return true // 只要 state 或 props 浅比较不等的话,就进行渲染
} else {
return false // 浅比较相等的话,不渲染
}
}
}

// 浅比较逻辑
const shallowEqual = function(oldState, nextState) {
const oldKeys = Object.keys(oldState)
const newKeys = Object.keys(nextState)

if (oldKeys.length !== newKeys.length) {
return false
}

let flag = true
for (let i = 0; i < oldKeys.length; i++) {
if (!nextState.hasOwnProperty(oldKeys[i])) {
flag = false
break
}

if (nextState[oldKeys[i]] !== oldState[oldKeys[i]]) {
flag = false
break
}
}

return flag
}

测试用例

测试用例用 在 React 上提的一个 issue 中的案例,我们期望点击增加按钮后,页面上显示的值能够加 1。

1
2
3
4
5
6
7
8
9
10
11
12
13
14
15
16
17
18
19
20
21
22
23
24
class B extends PureComponent {
constructor(props) {
super(props)
this.state = {
count: 0
}
this.click = this.click.bind(this)
}

click() {
this.setState({
count: ++this.state.count,
})
}

render() {
return (
<div>
<button onClick={this.click}>增加</button>
<div>{this.state.count}</div>
</div>
)
}
}

然而,我们点击上述代码,页面上显示的 0 分毫不动!!!

揭秘如下:

1
2
3
4
5
6
7
click() {
const t = ++this.state.count
console.log(t === this.state.count) // true
this.setState({
count: t,
})
}

当点击增加按钮,控制台显示 t === this.state.count 为 true, 也就说明了 setState 前后的状态是统一的,所以 shallowEqual(浅比较) 返回的是 true,致使 shouldComponentUpdate 返回了 false,页面因此没有渲染。

类似的,如下写法也是达不到目标的,留给读者思考了。

1
2
3
4
5
click() {
this.setState({
count: this.state.count++,
})
}

那么如何达到我们期望的目标呢。揭秘如下:

1
2
3
4
5
click() {
this.setState({
count: this.state.count + 1
})
}

感悟:小小的一行代码里蕴藏着无数的 bug。

HOC 实践

高阶组件(Higher Order Component) 不属于 React API 范畴,但是它在 React 中也是一种实用的技术,它可以将常见任务抽象成一个可重用的部分。这个小节算是番外篇,会结合 cpreact(前文实现的类 react 轮子) 与 HOC 进行相关的实践。

它可以用如下公式表示:

1
2
3
4
5
y = f(x),

// x:原有组件
// y:高阶组件
// f():

f() 的实现有两种方法,下面进行实践。

属性代理(Props Proxy)

这类实现也是装饰器模式的一种运用,通过装饰器函数给原来函数赋能。下面例子在装饰器函数中给被装饰的组件传递了额外的属性 { a: 1, b: 2 }。

声明:下文所展示的 demo 均已在 cpreact 测试通过

1
2
3
4
5
6
7
8
9
10
11
12
13
14
15
16
17
18
19
20
21
22
function ppHOC(WrappedComponent) {
return class extends Component {

render() {
const obj = { a: 1, b: 2 }
return (
<WrappedComponent { ...this.props } { ...obj } />
)
}
}
}

@ppHOC
class B extends Component {
render() {
return (
<div>
{ this.props.a + this.props.b } { /* 输出 3 */ }
</div>
)
}
}

要是将 { a: 1, b: 2 } 替换成全局共享对象,那么不就是 react-redux 中的 Connect 了么?

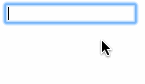
改进上述 demo,我们就可以实现可插拔的受控组件,代码示意如下:

1
2
3
4
5
6
7
8
9
10
11
12
13
14
15
16
17
18
19
20
21
22
23
24
25
26
27
28
29
30
31
32
33
34
35
36
37
38
39
40
function ppDecorate(WrappedComponent) {
return class extends Component {
constructor() {
super()
this.state = {
value: ''
}
this.onChange = this.onChange.bind(this)
}

onChange(e) {
this.setState({
value: e.target.value
})
}

render() {
const obj = {
onChange: this.onChange,
value: this.state.value,
}

return (
<WrappedComponent { ...this.props } { ...obj } />
)
}
}
}

@ppDecorate
class B extends Component {
render() {
return (
<div>
<input { ...this.props } />
<div>{ this.props.value }</div>
</div>
)
}
}

效果如下图:

这里有个坑点,当我们在输入框输入字符的时候,并不会立马触发 onChange 事件(我们想要让事件立即触发,然而现在要按下回车键或者点下鼠标才触发),在 react 中有个合成事件 的知识点,下篇文章会进行探究。

顺带一提在这个 demo 中似乎看到了双向绑定的效果,但是实际中 React 并没有双向绑定的概念,但是我们可以运用 HOC 的知识点结合 setState 在 React 表单中实现伪双向绑定的效果。

继承反转(Inheritance Inversion)

继承反转的核心是:传入 HOC 的组件会作为返回类的父类来使用。然后在 render 中调用 super.render() 来调用父类的 render 方法。

《ES6 继承与 ES5 继承的差异》中我们提到了作为对象使用的 super 指向父类的实例。

1
2
3
4
5
6
7
8
9
10
11
12
13
14
15
16
17
18
19
20
21
function iiHOC(WrappedComponent) {
return class extends WrappedComponent {
render() {
const parentRender = super.render()
if (parentRender.nodeName === 'span') {
return (
<span>继承反转</span>
)
}
}
}
}

@iiHOC
class B extends Component {
render() {
return (
<span>Inheritance Inversion</span>
)
}
}

在这个 demo 中,在 HOC 内实现了渲染劫持,页面上最终显示如下:

可能会有疑惑,使用属性代理的方式貌似也能实现渲染劫持呀,但是那样做没有继承反转这种方式纯粹。

鸣谢

Especially thank simple-react for the guidance function of this library. At the meantime,respect for preact and react

相关链接

Title:从 0 到 1 实现 React 系列 —— 5.PureComponent 实现 && HOC 探幽

Author:牧云云

Posted On:2018/08/27 11:08

Update Time:2018/11/26/ 22:11

Origin Link:http://muyunyun.cn/posts/92dc08c6/

EULA: 署名-非商业性使用-禁止演绎 4.0 国际 转载请保留原文链接及作者。