
本系列文章在实现一个 cpreact 的同时帮助大家理顺 React 框架的核心内容(JSX/虚拟DOM/组件/生命周期/diff算法/setState/PureComponent/HOC/…) 项目地址
组件即函数
在上一篇 JSX 和 Virtual DOM 中,解释了 JSX 渲染到界面的过程并实现了相应代码,代码调用如下所示:
1
2
3
4
5
6
7
8
9
10
11
12
13
| import React from 'react'
import ReactDOM from 'react-dom'
const element = (
<div className="title">
hello<span className="content">world!</span>
</div>
)
ReactDOM.render(
element,
document.getElementById('root')
)
|
本小节,我们接着探究组件渲染到界面的过程。在此我们引入组件的概念,组件本质上就是一个函数,如下就是一段标准组件代码:
1
2
3
4
5
6
7
8
9
10
11
12
13
| import React from 'react'
class A {
render() {
return <div>I'm componentA</div>
}
}
const A = () => <div>I'm componentA</div>
ReactDOM.render(<A />, document.body)
|
<A name="componentA" /> 是 JSX 的写法,和上一篇同理,babel 将其转化为 React.createElement() 的形式,转化结果如下所示:
1
| React.createElement(A, null)
|
可以看到当 JSX 中是自定义组件的时候,createElement 后接的第一个参数变为了函数,在 repl 打印 <A name="componentA" />,结果如下:
1
2
3
4
5
6
| {
attributes: undefined,
children: [],
key: undefined,
nodeName: ƒ A()
}
|
注意这时返回的 Virtual DOM 中的 nodeName 也变为了函数。根据这些线索,我们对之前的 render 函数进行改造。
1
2
3
4
5
6
7
8
9
10
11
12
13
| function render(vdom, container) {
if (_.isFunction(vdom.nodeName)) {
let component, returnVdom
if (vdom.nodeName.prototype.render) {
component = new vdom.nodeName()
returnVdom = component.render()
} else {
returnVdom = vdom.nodeName()
}
render(returnVdom, container)
return
}
}
|
至此,我们完成了对组件的处理逻辑。
props 和 state 的实现
在上个小节组件 A 中,是没有引入任何属性和状态的,我们希望组件间能进行属性的传递(props)以及组件内能进行状态的记录(state)。
1
2
3
4
5
6
7
8
9
| import React, { Component } from 'react'
class A extends Component {
render() {
return <div>I'm {this.props.name}</div>
}
}
ReactDOM.render(<A name="componentA" />, document.body)
|
在上面这段代码中,看到 A 函数继承自 Component。我们来构造这个父类 Component,并在其添加 state、props、setState 等属性方法,从而让子类继承到它们。
1
2
3
4
| function Component(props) {
this.props = props
this.state = this.state || {}
}
|
首先,我们将组件外的 props 传进组件内,修改 render 函数中以下代码:
1
2
3
4
5
6
7
8
9
10
11
12
13
| function render(vdom, container) {
if (_.isFunction(vdom.nodeName)) {
let component, returnVdom
if (vdom.nodeName.prototype.render) {
component = new vdom.nodeName(vdom.attributes)
returnVdom = component.render()
} else {
returnVdom = vdom.nodeName(vdom.attributes)
}
...
}
...
}
|
实现完组件间 props 的传递后,再来聊聊 state,在 react 中是通过 setState 来完成组件状态的改变的,后续章节会对这个 api(异步)深入探究,这里简单实现如下:
1
2
3
4
5
6
7
8
9
10
11
| function Component(props) {
this.props = props
this.state = this.state || {}
}
Component.prototype.setState = function() {
this.state = Object.assign({}, this.state, updateObj)
const returnVdom = this.render()
document.getElementById('root').innerHTML = null
render(returnVdom, document.getElementById('root'))
}
|
此时虽然已经实现了 setState 的功能,但是 document.getElementById('root') 节点写死在 setState 中显然不是我们希望的,我们将 dom 节点相关转移到 _render 函数中:
1
2
3
4
| Component.prototype.setState = function(updateObj) {
this.state = Object.assign({}, this.state, updateObj)
_render(this)
}
|
自然地,重构与之相关的 render 函数:
1
2
3
4
5
6
7
8
9
10
11
| function render(vdom, container) {
let component
if (_.isFunction(vdom.nodeName)) {
if (vdom.nodeName.prototype.render) {
component = new vdom.nodeName(vdom.attributes)
} else {
component = vdom.nodeName(vdom.attributes)
}
}
component ? _render(component, container) : _render(vdom, container)
}
|
在 render 函数中分离出 _render 函数的目的是为了让 setState 函数中也能调用 _render 逻辑。完整 _render 函数如下:
1
2
3
4
5
6
7
8
9
10
11
12
13
14
15
16
17
18
19
| function _render(component, container) {
const vdom = component.render ? component.render() : component
if (_.isString(vdom) || _.isNumber(vdom)) {
container.innerText = container.innerText + vdom
return
}
const dom = document.createElement(vdom.nodeName)
for (let attr in vdom.attributes) {
setAttribute(dom, attr, vdom.attributes[attr])
}
vdom.children.forEach(vdomChild => render(vdomChild, dom))
if (component.container) {
component.container.innerHTML = null
component.container.appendChild(dom)
return
}
component.container = container
container.appendChild(dom)
}
|
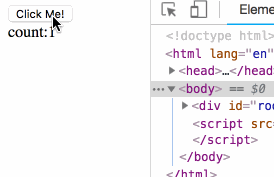
让我们用下面这个用例跑下写好的 react 吧!
1
2
3
4
5
6
7
8
9
10
11
12
13
14
15
16
17
18
19
20
21
22
23
24
25
26
27
28
| class A extends Component {
constructor(props) {
super(props)
this.state = {
count: 1
}
}
click() {
this.setState({
count: ++this.state.count
})
}
render() {
return (
<div>
<button onClick={this.click.bind(this)}>Click Me!</button>
<div>{this.props.name}:{this.state.count}</div>
</div>
)
}
}
ReactDOM.render(
<A name="count" />,
document.getElementById('root')
)
|
效果图如下:
至此,我们实现了 props 和 state 部分的逻辑。
forceUpdate 的实现
声明:这部分为补充章节,可以选择性阅读。涉及到后文生命周期、setState 章节的知识点。
当没有使用 setState 更新 state 状态时,通常要结合 forceUpdate 一起使用,例子如下:
1
2
3
4
5
6
7
8
9
10
11
12
13
14
15
16
17
18
19
20
21
22
23
24
25
26
27
28
| class B extends Component {
constructor(props) {
super(props)
this.state = {
count: {
value: 1
}
}
}
shouldComponentUpdate() {
return false
}
click() {
this.state.count.value = ++this.state.count.value
this.forceUpdate()
}
render() {
return (
<div>
<button onClick={this.click.bind(this)}>Click Me!</button>
<div>{this.state.count.value}</div>
</div>
)
}
}
|
这里要注意一个点当使用 forceUpdate() 时,shouldComponentUpdate() 会失效,下面我们来补充 forceUpdate() 的代码逻辑:
1
2
3
4
5
|
Component.prototype.forceUpdate = function(cb) {
this.allowShouldComponentUpdate = false
asyncRender({}, this, cb)
}
|
相应的在 render.js 中加上 allowShouldComponentUpdate 的判断条件:
1
2
3
4
5
6
7
8
9
| function renderComponent(component) {
if (component.base && component.shouldComponentUpdate && component.allowShouldComponentUpdate !== false) {
const bool = component.shouldComponentUpdate(component.props, component.state)
if (!bool && bool !== undefined) {
return false
}
}
...
}
|
小结
组件即函数;当 JSX 中是自定义组件时,经过 babel 转化后的 React.createElement(fn, ..) 后中的第一个参数变为了函数,除此之外其它逻辑与 JSX 中为 html 元素的时候相同;
此外我们将 state/props/setState 等 api 封装进了父类 React.Component 中,从而在子类中能调用这些属性和方法。
在下篇,我们会继续实现生命周期机制,如有疏漏,欢迎斧正。
鸣谢
Especially thank simple-react for the guidance function of this library. At the meantime,respect for preact and react